
front_print_mesh.stl the print took with an infill of 40% exactly two hours on my custom mendel90 3D printer.
Sunday, 19.03.2017

Unwittingly invented bike light
There is no way around I need a light! A short look at the Austrian bicycle regulation clearly explains: If you want to use your bike at low light or at night you need (among other stuff) an active light! On the front it has to be a continuous fixed mounted white or yellow light with a luminosity of 100 [cd]. The backlight has to be red (continuous or blinking) with a luminosity of 1 [cd].
The good thing: In Austria the active light doesn't need a CE sign!
Everything (for Austria) is regulated in the "Verordnung der Bundesministerin für Verkehr, Innovation und Technologie über Fahrräder, Fahrradanhänger und zugehörige Ausrüstungsgegenstände (Fahrradverordnung) StF: BGBl. II Nr. 146/2001"
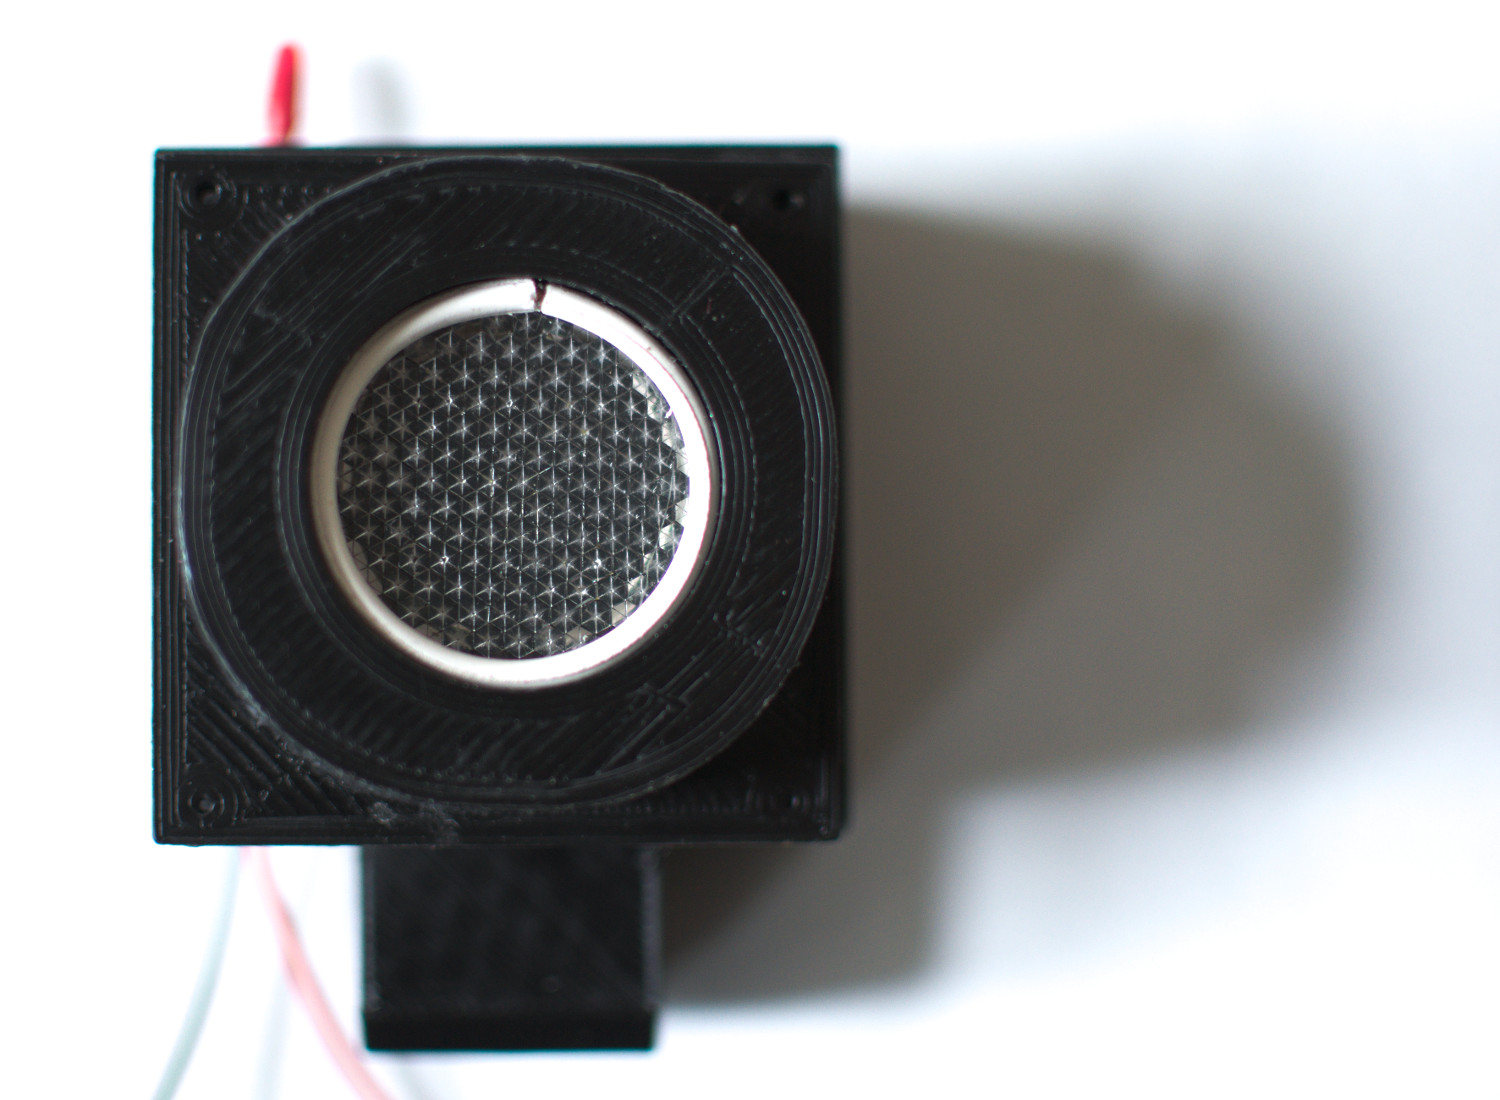
For the first version I just took an existing bike light laying around on the flat with no use (the battery already leaked) and started to design a case for it! I tore down the light to it's electronics heart (also kept the reflector) and made a roughly 3d model of the PCB, the on off switch and the battery holder which have to fit into the case.
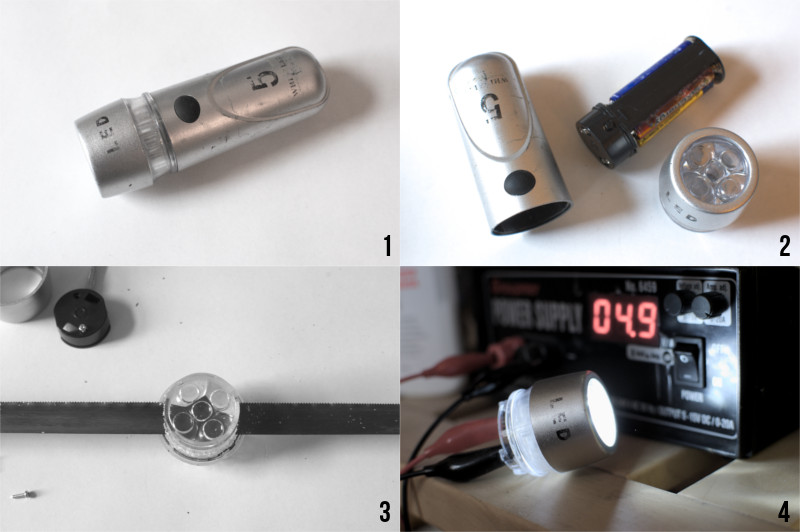
1. Old LED bike light 2. Disassembling
3. Shorten the reflector 4. Still working?

3d model with the switch, batteryholder and LED-PCB
front_print_mesh.stl the print took with an infill of 40% exactly two hours on my custom mendel90 3D printer.

body_print_mesh.stl Infill 40%, no bridges. There is a "helper-structure" for the switch. (Just tear it off before installing the switch.) Depending on how precise your 3d printer prints, you have to hone down the wholes a little
bit. The printing time was about 6 hours!
Download the Freecad project file of version one. I used Freecad 0.16. Basically I was happy with the overall result but it looked a bit too clumsy on my bike. So I decided
to make a version two where I develop a custom PCB and a 9V block battery to make the light lighter!
Saturday, 25.03.2017
For Version two is an all DIY light. That means to develop also the PCB to make the overall light more "compact!". For the power supply I took a 9 Volt block battery. I like the form factor. We will see how long it will
last and shine.

I'm using a 555 timer IC to let the backlight blink for every second
| PART | VALUE | AMOUNT |
|---|---|---|
| LEDS (white) | 3.2V/20mA | 7 |
| R1 | 220k | 1 |
| R2 | 1M | 1 |
| R3 | 150 Ohm | 1 |
| R4-R8 | 330 Ohm | 5 |
| C1 | 1uF | 1 |
| NE555 | 555 | 1 |
| Switch | On_OFF | 1 |
| Battery | 9V | 1 |
| Terminal Block | 2Pole,2.54mm | 2 |
| Battery Clip Snap | - | 1 |
Download the KICAD project files. I used Kicad 4.0.5.
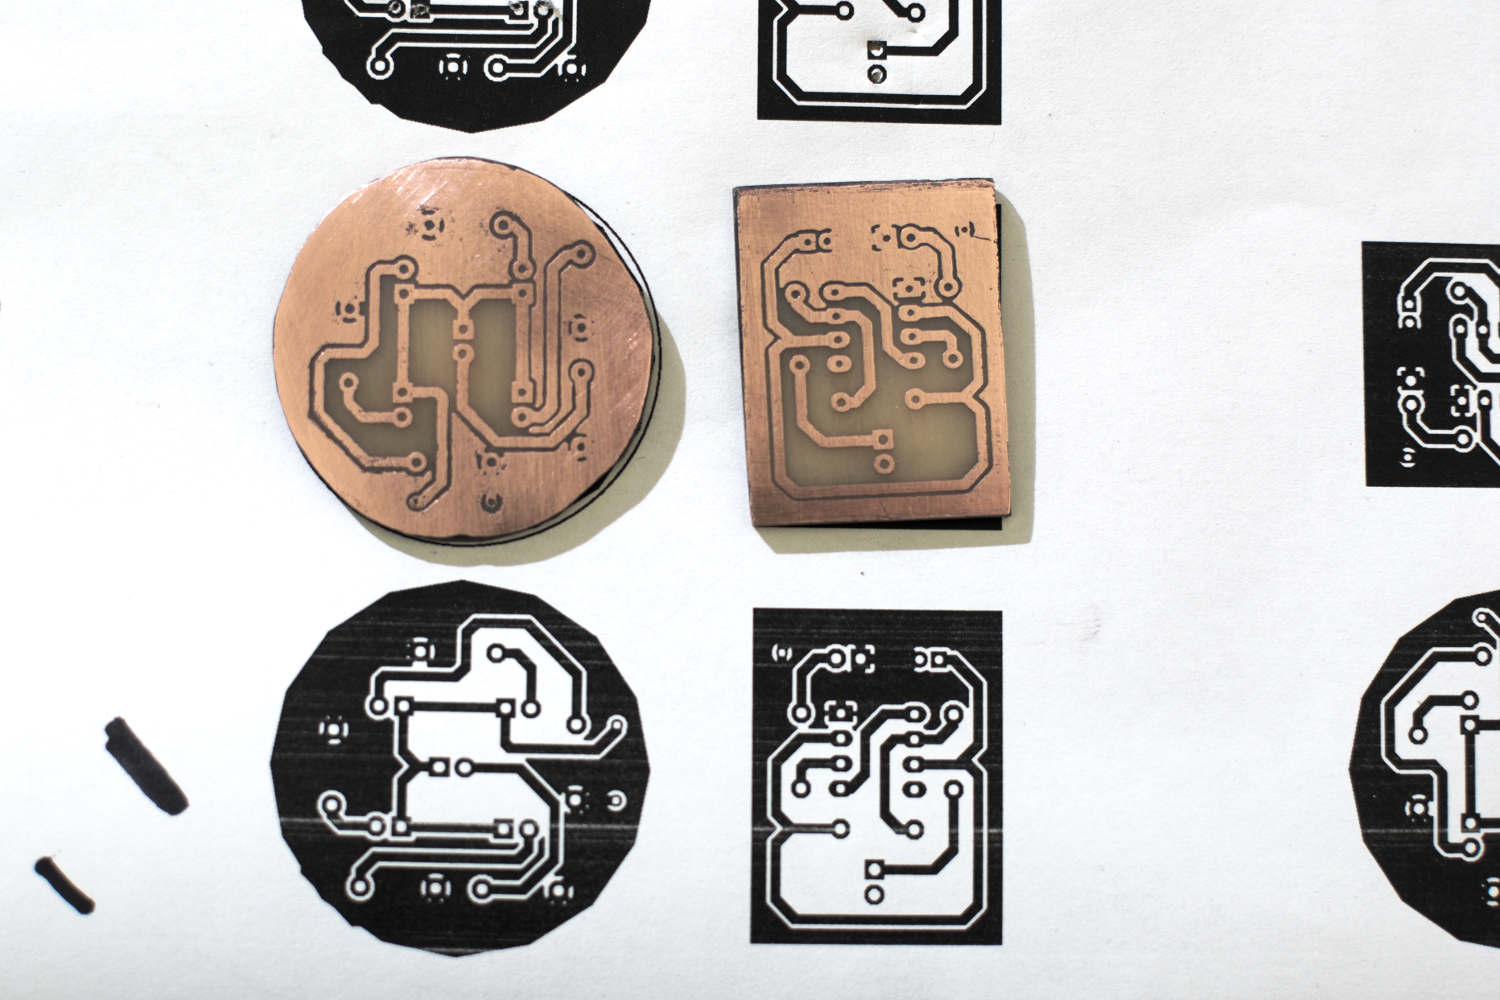
The eched PCB
Download the Freecad project file of version two. Again I used Freecad 0.16.
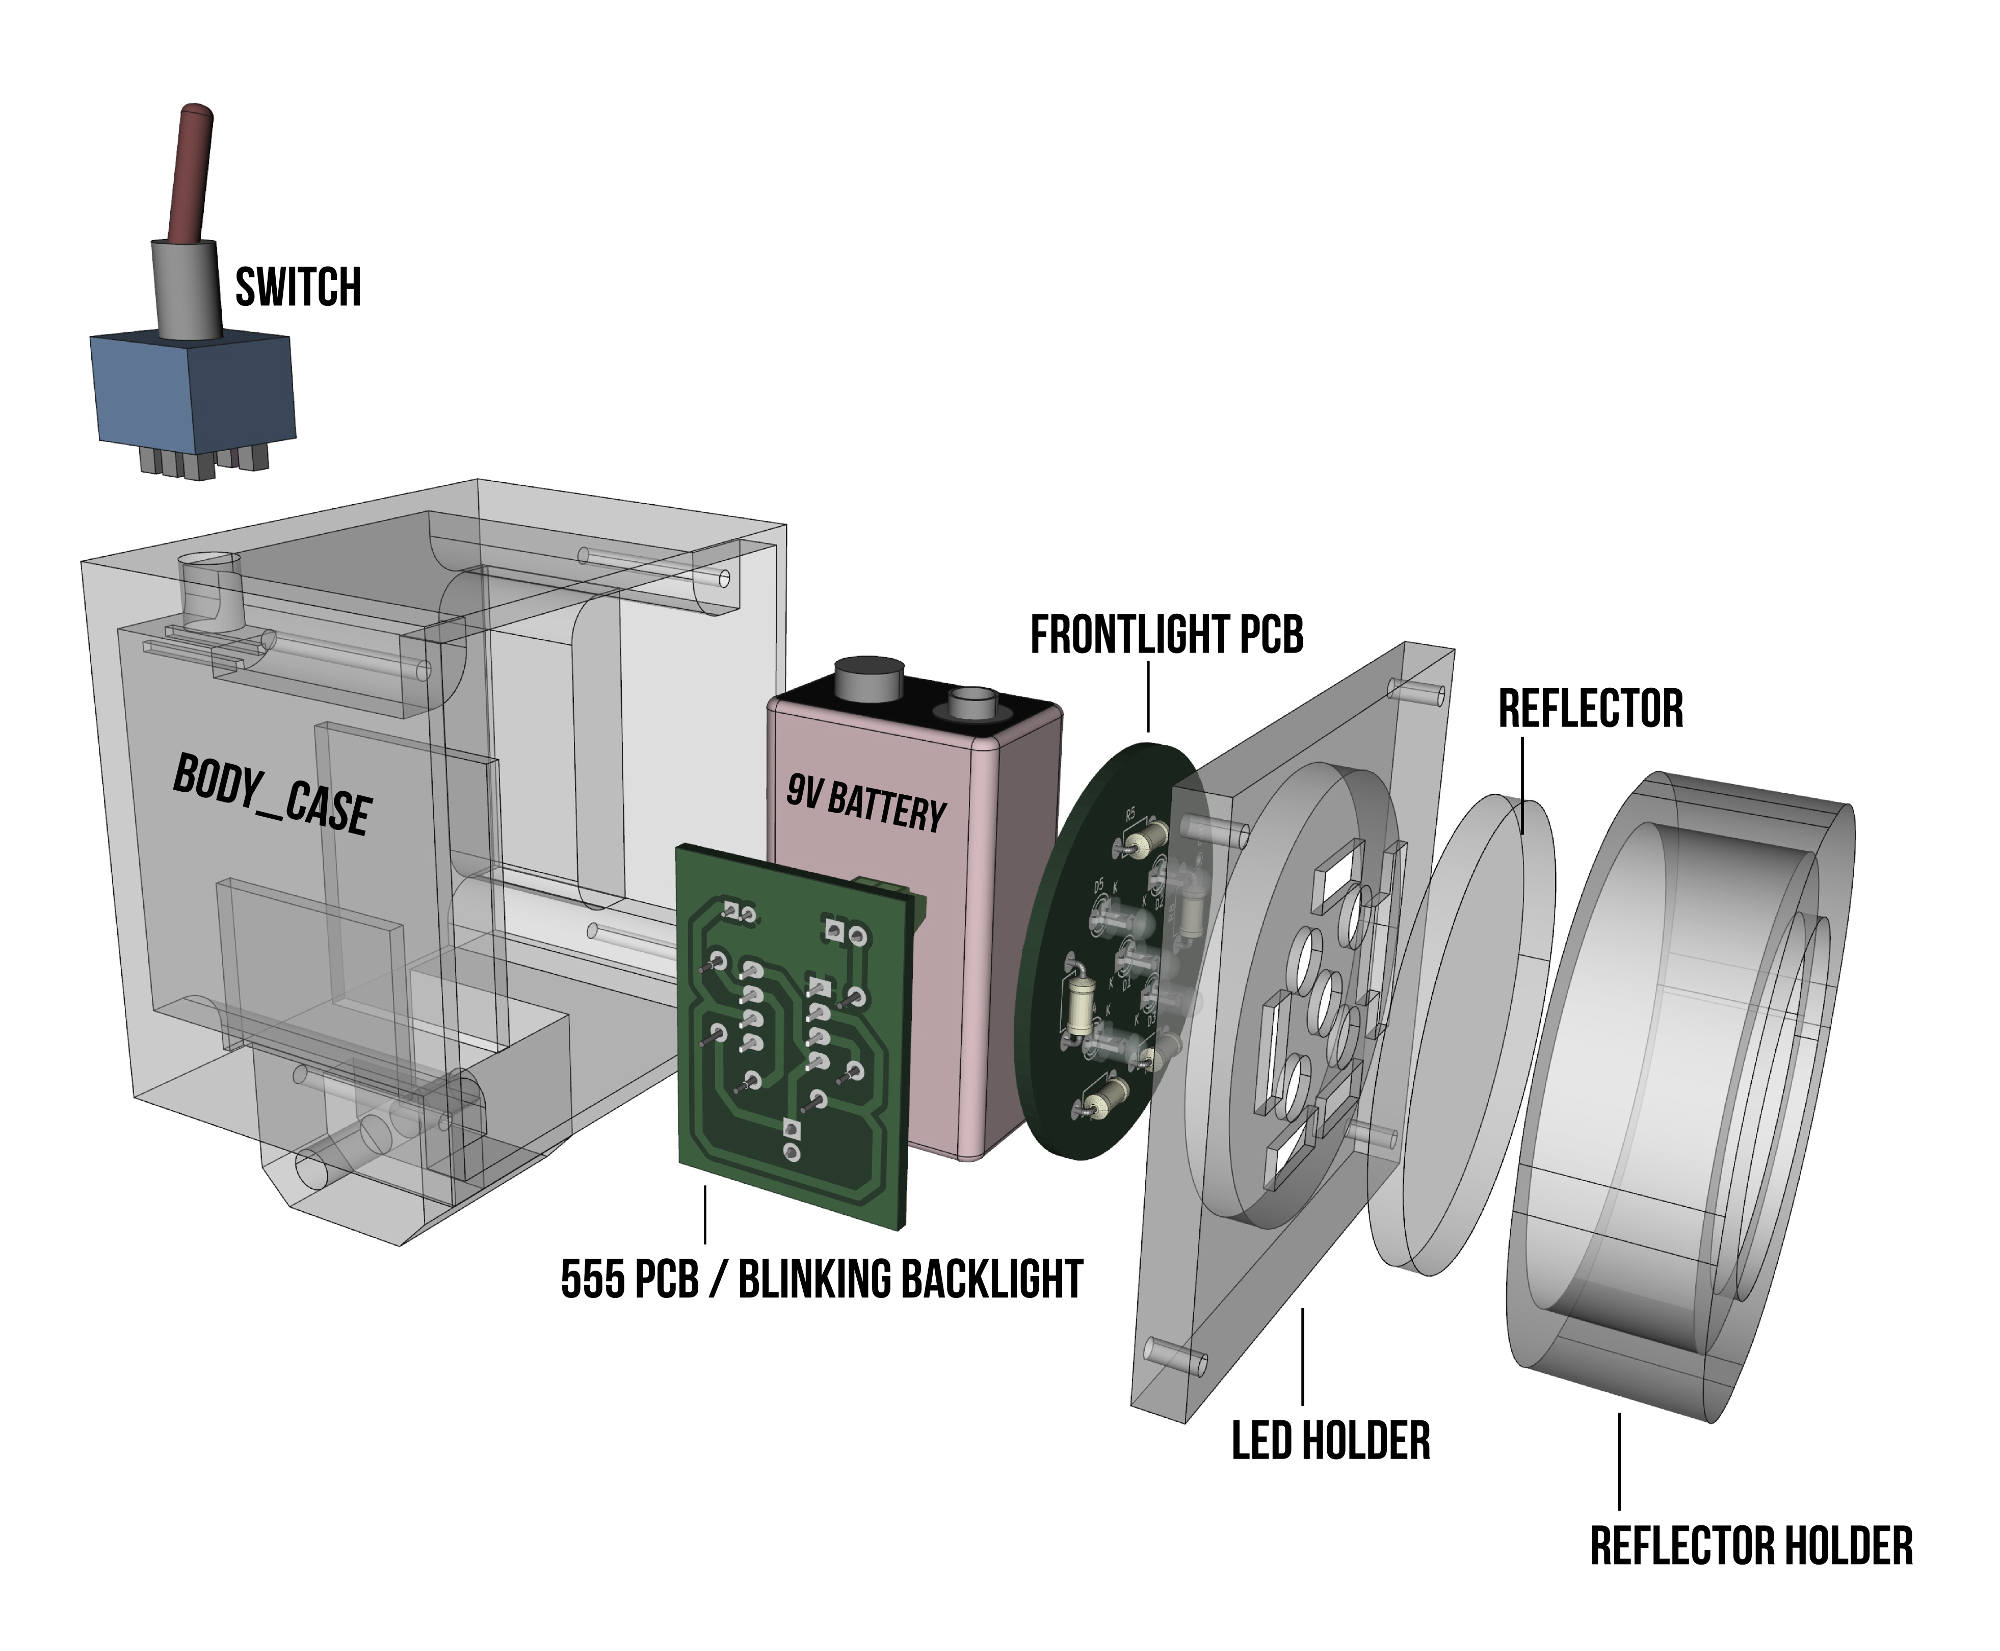
explosion sketch
I simply glued the FrontPCB with a few tips of hot glue onto the printed LED holder. Also the reflector has to be glued on the LED holder. Put the reflector in between! I probably change the layout in Version 3 (if version two dies some day) and also mount the Reflector holder with screws.

Fully assembled 3d model
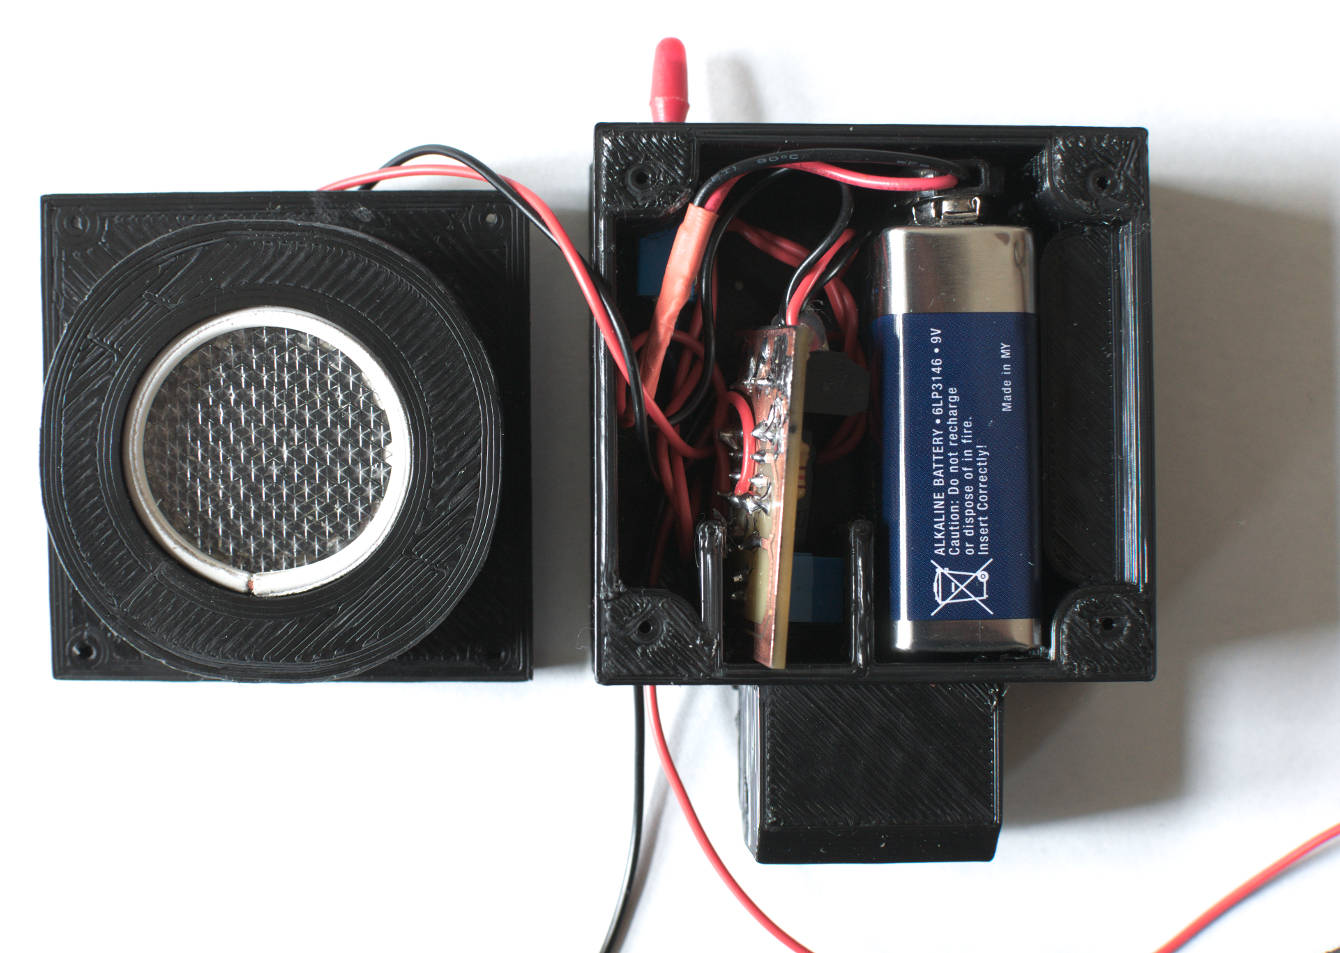
does everything fit?
Finished BikeLight (oooh I missed the four screws which connect the front with the body case on the foto!)


